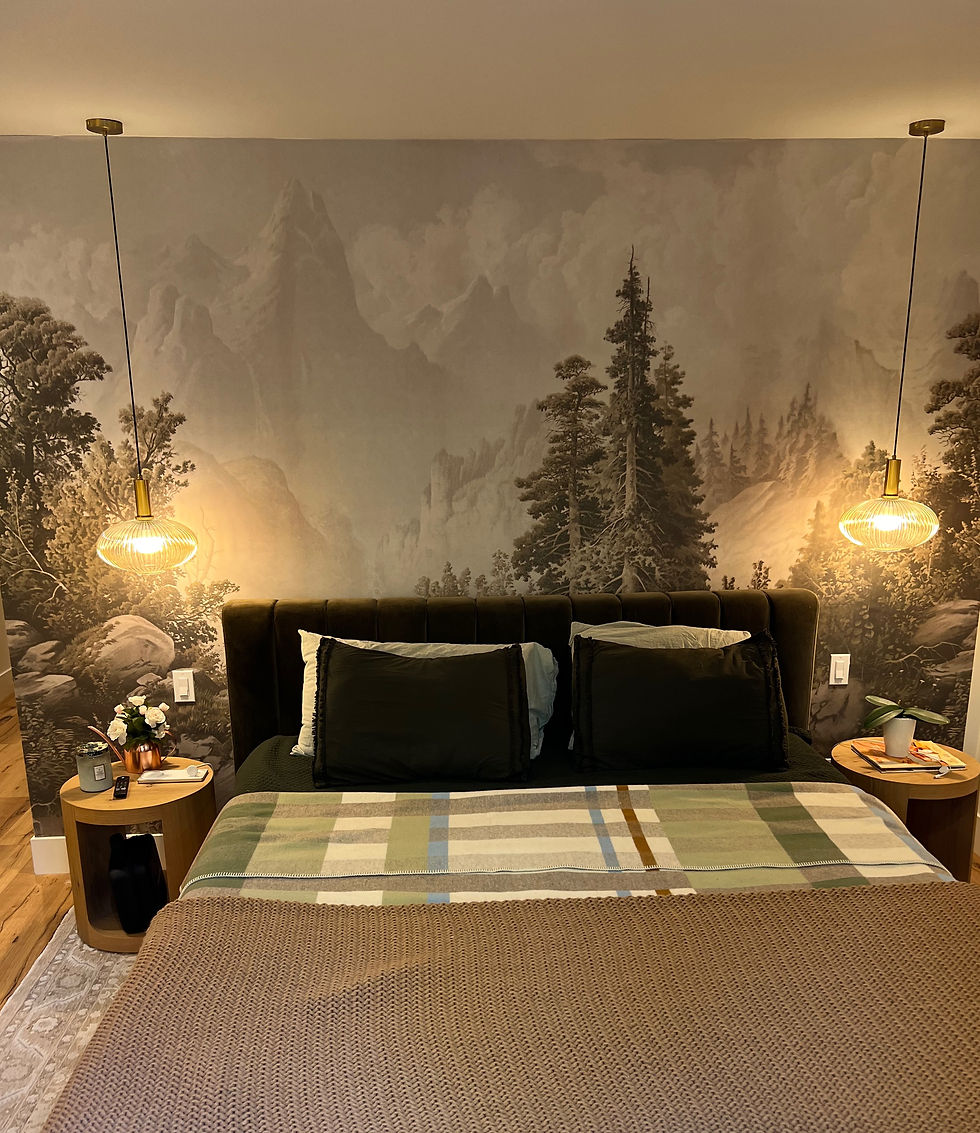
Transforming My Bedroom with a Rebel Wallpaper Mural: A Step-by-Step Journey
- Mary Alex Daniels

- Nov 14, 2024
- 4 min read

When it comes to home decor, I love how a well-chosen wallpaper mural can instantly elevate a space. I recently decided to refresh my bedroom, and after a bit of searching, I came across the perfect mural from Rebel Walls. Here’s a look at the journey, from planning and prep work to some lessons learned along the way, complete with photos to showcase each step.
Choosing the Right Mural
I wanted something that would bring a calming, natural feel to the room, and Rebel’s mural featuring a misty forest landscape was exactly what I had in mind. Not only did the design speak to me, but Rebel Walls also had an impressive reputation for user-friendly installation, which I was excited to try out.

Step 1: Planning and Preparation
One of the first things I learned (and was grateful for!) is that Rebel Walls gives very clear instructions for installation. Right on each wallpaper panel, they include dotted lines for cutting and numbers to indicate the correct sequence. This extra guidance made it much easier to ensure that each panel was aligned perfectly, starting from left to right.
Key Tip: Measure Twice, Cut Once
I provided Rebel Walls with the dimensions of my wall, and they sized the mural exactly to fit. Unfortunately, I made a small error in my measurements, so my mural ended up being just a bit short. But the precise customization was still a big plus because it ensured I didn’t have to worry about excess material or resizing panels. Double-check your measurements, and this feature will make the installation even smoother!

Step 2: Prepping the Walls
Having done a few wallpaper installations before, I knew that wall prep would be crucial. If there's any dust, sand, or uneven texture on your walls, the wallpaper can start to bubble or peel over time. Rebel Walls recommended prepping the wall beforehand, so I thoroughly cleaned it and applied a fresh coat of glossier paint to ensure good adhesion.
Tip: If you skip the wall prep, you’ll likely regret it later. Even the highest-quality peel-and-stick wallpaper can bubble if the wall isn’t prepared correctly.
Step 3: Cutting and Organizing Panels
I found it incredibly helpful to follow Rebel's advice on cutting and laying out each panel before starting. Since they’re labeled in numerical order, it was easy to arrange them from left to right to visualize the final look before I began adhering them to the wall. This step also helped prevent mistakes, making sure I didn’t accidentally pick up the wrong panel next.
Each panel also had a dotted line at the top and bottom, which made it easy to cut precisely. When aligned with the ceiling and wall intersection, it gave a polished, professional look with very little fuss.

Step 4: Applying the Wallpaper
This part was surprisingly straightforward. With the panels prepped and organized, I began sticking them to the wall one by one. Because Rebel’s wallpaper is peel-and-stick, I could easily adjust and reposition panels as needed without damaging the wallpaper or the wall paint underneath.
One of my favorite features was that the panels are not only pre-cut to size but are also designed to line up seamlessly, making it much easier to create a cohesive image without gaps or misalignment. The whole installation took about three hours from start to finish—a record time compared to some other wallpaper projects I’ve done in the past!
The End Result: A Bedroom with a View
Once finished, the mural completely transformed the room. The soft forest tones brought a peaceful ambiance, and I love how the wallpaper fits perfectly, even though it was a few inches short on one side due to my measuring error.

Challenges & Lessons Learned
While the installation was easy, I did encounter some unexpected challenges, mostly due to the environmental conditions in my mountain home at 8,200 feet. Here’s what I discovered:
- Humidity Sensitivity: Because it’s a peel-and-stick wallpaper, it seems more sensitive to humidity changes than traditional wallpaper. I noticed that even small amounts of humidity from a nearby shower would cause some bubbling, and running a humidifier at night made the wallpaper buckle. Interestingly, the bubbles usually flatten out by morning, but it’s something to be aware of if you’re in a high-altitude or variable-humidity environment.
- Environmental Considerations: In my other home, which is at sea level, I’ve never experienced this issue with peel-and-stick wallpaper. I suspect the altitude and dryness may be affecting the adhesive. If you're planning a similar project, consider consulting Rebel Walls or other experts about environmental compatibility to prevent issues.
Final Thoughts
Overall, I’m thrilled with the results. Rebel’s wallpaper not only added a unique and stunning design to the room but also offered some of the easiest installation features I’ve seen. The clear instructions, dotted cut lines, numbered panels, and custom sizing made the whole process surprisingly enjoyable. While the peel-and-stick feature does require some environmental awareness, I’d still recommend it for anyone looking to refresh a room with a high-quality mural.
Things to Remember:
- Double-check measurements to ensure a perfect fit.
- Prep your walls—it’s worth the extra effort.
- Consider environmental factors, especially if your home experiences humidity changes.
With a little planning and care, adding a Rebel wallpaper mural can be a fantastic DIY project that brings new life to any room. I’m so happy with how my bedroom turned out, and I’m looking forward to tackling more spaces in the future!


Comments